Baby Shoes and Creating a Bib Pattern

We just returned from a trip to Alabama to visit family and friends (which explains my lack of posts recently). A few days before we left, I decided to make a quick gift for some friends who recently had a baby boy. I originally wanted to make a Jon Jon but since I was limited in time and supplies, I decided I needed another idea. I found this cute little tutorial and pattern for baby shoes and decided I would make a couple of pairs. I grabbed my new Robert Kaufman Out N’ About Cameras fabric and a large scrap of my striped fabric leftover from my Big Boy Pocket Pants. Unfortunately, my first attempt was a failure. I think I must have made a mistake cutting the fabric. Luckily, my second pair turned out just fine!

camera shoesA single pair of shoes just didn’t seem like enough, so I decided to make a couple of matching bibs to go with them. I didn’t have a pattern for a bib but I thought I could draft one based on an old bib I found packed away in a kitchen drawer.

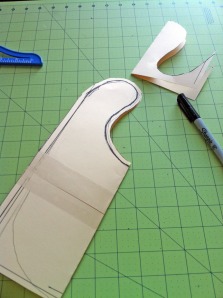
To make the pattern, I taped a few pieces of card stock together and traced around the bib. I squared off the bottom to make it more a little more boyish.

traced and squared bib

After adding the seam allowance, I realized the straps weren’t quite even, so I folded the pattern in half and cut both sides at the same time to make sure they were mirror images of each other. In hind sight, I suppose I could have created a half pattern to be cut on a fold instead.

cut folded bib folded bib

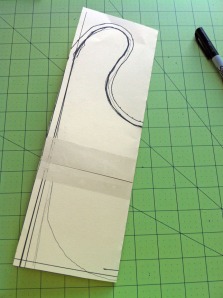
Here is the finished pattern.

finished bib pattern

I then cut out my front and back pieces, sewed them along the edges (right sides together) leaving a two inch opening. Using my opening, I turned the bibs right side out and closed the opening after pressing the edges inwards.

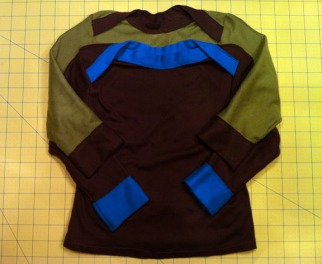
Since I didn’t have any flannel or minky in my stash, I used brown knit for the underside.

back of bib

I think they turned out pretty cute!
finished bibs and shoes

Making a Pattern from a Pair of Pants

original pantsI have a really cute pair of toddler girl knit pants that have been sitting around for a year. There is only one lonely pair and I have two cute little girls who would love to wear them! I would like to eventually make a second pair in a different color knit but I have put that project off for another day.

Doodles - Flower Toss Turquois

Doodles – Flower Toss Turquois

In the meantime, I already had some really cute corduroy fabric I picked up from JoAnns that I wanted to make into pants for the girls.

I decided that since I will eventually need a pattern for the second pair of knit pants, I would go ahead and try to make one. Then, I could use it for the corduroy pants as well.  I had my first experience making a pattern with the knit shirts. It was not exactly easy but since I had more experience making pants, I figured I could handle it. Actually, it turned out to be pretty simple.

First, I traced one of the legs (not including the ruffle) on to a large piece of paper and then added my seam allowance.

pants laid out to tracepattern traced out

Then I measured the length and width of the ruffle, added in the seam allowance, and wrote those dimensions on my pattern. I did not do a pattern for them because they are basically large rectangles. Notice I wrote them out incorrectly at first. I forgot to double up the length measurement so they could go all the way around the leg! Very important for pants to actually enclose the leg, I think. 😉 Luckily, I caught it before I cut!

measuring ruffle

final patternThen, I laid out and traced my pattern on the fabric while trying to match up the lines of flowers on the fabric. I knew the large flowers would never match up at the seams but I thought it would be less distracting if the lines of flowers did.

tracing panelscut panelsThen, I sewed them together pretty much the same way I did these pants. Except this time, I added the ruffle.

In the end, I failed miserably at trying to match up the design because the fabric’s pattern is actually pretty complicated. I wasted an extra yard of fabric doing this but I learned a valuable lesson, some fabrics just don’t need to line up. I think they turned out pretty cute despite it!

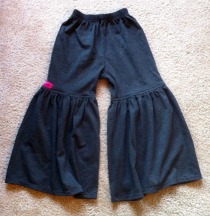
finished pants

pants on N

Oh, and one last thing… I just couldn’t help myself and made some shirts to match!

flower shirts

Knit Nitwit

finished knit shirtsWell it was bound to happen. Things were going too smoothly in my sewing adventures. I guess I needed a reality check. I kept reading blog entries about sewing with knits being difficult but they always ended with something along the lines of “don’t be scared… go for it!” So I decided to give it a try.

I wanted to make some little boy clothes since I had only focused on clothes for the girls so far. The weather was cold and my little man needed more long-sleeve shirts. I decided to use the shirt tutorial from MADE since the pant one I did recently was successful. I went out and bought three different colors of solid knits from Joann’s and set to work.
knits

First, I needed to create my own pattern from a existing piece of clothing. I decided to sacrifice a 24-month onesie. I cut it apart and traced the pieces on some large art paper already scribbled on by my kids.

onsie cut up

I then added a ½ inch seam allowance to the traced images. Labeled them and cut them out.

pattern

Then I cut my pieces of fabric out.

cut fabric

Sewed the ribbing on.

neck ribbing sewn on

Looks good so far, right?…Ugh.

First, after beginning to assemble my sleeves, I realized they were too narrow at the wrist. I did have to fudge the long sleeve pattern because my onesie was short sleeved so I redrew a new pattern that I hoped would result in a better fitting sleeve.

new and old sleeve

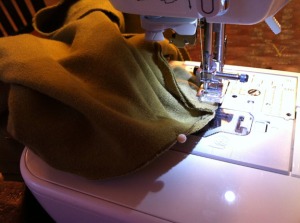
I then re-sewed the newly-cut long sleeves and assembled the rest of the shirt. It was difficult to sew the sleeve to the shirt because it was too narrow to fit even the free arm but I got through it by placing the entire shirt on top of the machine’s bed and sewing slowly so I wouldn’t catch extra shirt material in the stitches.

sewing sleeves on

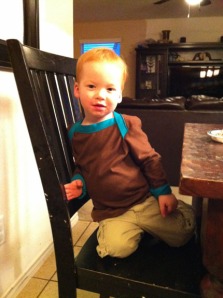
I then hemmed the bottom, turned it right side out, and tried it out on my son. Pretty cute huh?

calder with shirt on

That doesn’t seem too bad? Oh yeah, I forgot to mention the part where AFTER I made a second shirt for him, I had to stretch it to fit over him (I had tried to make it slimmer in places) and I heard the stitches snap. That is the moment I realized you can’t just use any ol’ straight stitch to sew up a knit garment. So, I disassembled TWO shirts, researched what stitches to use and sewed them back together again!

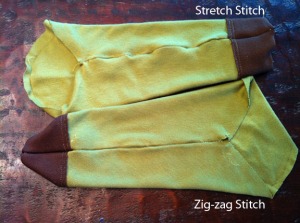
I tried two different stitches on the sleeves to determine which stitch to use on my fabric. For the top sleeve, I used a stretch stitch and the bottom is a zig zag stitch.  Since the stretch stitch caused more puckering, I went with the zig zag.

sleeve stitches

Before I finished sewing the shirts together, I had adjusted my zig zag a bit more and ended up with a pretty clean stitch that still gave enough so as not to break when stretched.

As for the bottom hem, I found a straight stitch with a long stitch length worked just fine.

I thought I was in the clear until I did this…

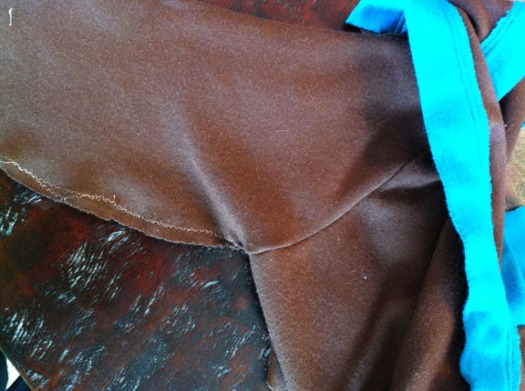
sleeve sewn on inside out

Yep, I sewed that sleeve on inside out! Oh well. I ripped that sucker off and sewed it on correctly.

So now I have two long sleeve shirts finally finished and it is 70 degrees outside. Hopefully, he will get to wear them at least once before he outgrows them!