 I have an addiction. I can’t seem to stop buying digitized appliqué designs and have way more than any one person should EVER need. Every time there is a sale, I get excited. Then, there are the freebies! I just can’t help myself when it comes to freebies!
My son recently turned turned 2 and I decided to make him a birthday shirt to wear to school. I dug through all my birthday-themed appliqué files and found one suitable for a little boy. I have also come to realize that I have a lot more girl-themed appliqués then boy. More reason to shop!
So as promised… here is my appliqué tutorial. Yep, I know there are plenty of them out there but I have noticed that everybody does it a little differently. Here is the way I am currently doing it for my shirts:
Supplies needed:
- Embroidery machine 😉
- T-Shirt
- Appliqué design file
- Fabrics
- Iron-on tear-away stabilizer
- Cut-away stabilizer – I like Sulky tender touch because you can also iron it on the inside of the finished shirt to keep toddler skin from being irritated by the embroidery.
- Embroidery thread
- Scissors – I have a pair of small curved Fiskars scissors that are perfect for this. The curved edge helps you cut really close to the edge of the appliqué fabric.
I borrowed major parts of my process from Cole’s Corner and Creations. Her tutorial is a lot more involved. I am always looking for ways to cut corners with my projects so I have eliminated some of the steps that didn’t work for me. I also am not making shirts for anyone but my children so if you are making a shirt for a gift or profit, I suggest you use her tutorial instead!
All right, here we go!
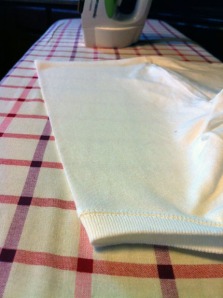
First, I iron a vertical crease down the front of the shirt.
I then cut a piece of tear-away stabilizer slightly smaller than my hoop. Fold it both vertically and horizontally. Line up the vertical crease of the tear-away with the vertical crease in the shirt and iron it to the inside of the shirt. (Pay close attention to which stabilizer I am using where in this tutorial. I know it can get confusing! I have underlined each type to help you.)
If you have ironed out the crease, then re-iron it.
Place a piece of cut-away stabilizer in your hoop and pull on the edges until it is tight.
Use the creases you made in your shirt to align it evenly within the hoop and then pin the shirt to the cut-away stabilizer that is tightened in the hoop.
Make sure the outside of the shirt is facing up when you place your hoop in your machine.
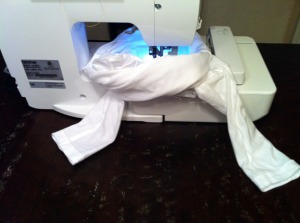
And make sure your sleeves are not tucked underneath!!!
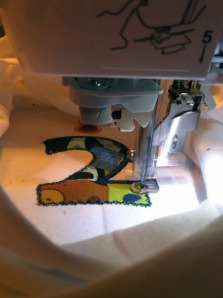
If this is your first time using an appliqué design file, there are 3 parts to each section.
- The First Outline – lets you know exactly where to place your fabric
- The Second Outline – sews down your fabric
- The Final embroidery – puts down the decorative stitches
Let the machine run the first outline and then place your fabric.
Run the second outline. Use your curved scissors to cut the fabric off as close to the stitched edge as possible without cutting the thread. You may have to remove the hoop from the machine to do this. Be careful not to shift your hooped material.
Run your final embroidery.
Repeat with the rest of the design.
Please try not to be discouraged if you run into issues. I always seem to have a problem of one type or another. You can usually figure out what is happening by reading your machine’s manual or searching for help online.
This time it was that my needles kept breaking.
I was pretty frustrated until I finally realized my kids had been playing with my machine and had turned the tension dial too tight! I loosened it and didn’t have another issue! Luckily, I also had plenty of extra needles.
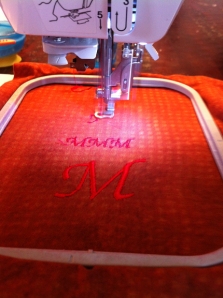
After finishing the appliqué, I decided to embroider my son’s name underneath the design. To do this, I unhooped my finished design, tore off the tear-away stabilizer and cut off the cut-away stabilizer. I then started back at the beginning by attaching the folded stabilizer and continuing on through the steps I used to prep the shirt the first time around.
I do have quite a few fonts I have downloaded but I found it easier to use the ones that came pre-installed on my machine. I suggest you run a few sample sizes on a scrap piece of fabric so you can determine the right size lettering for your project.
Once you have determined the correct size and placement, re-hoop your shirt centered on where you want the middle of your text to be and embroider away!
Here is Calder (with his big sisters) wearing the finished shirt on his birthday! Can you believe this is the only thing I have made for him. I really need to come up with more little boy sewing projects soon!


