
 Alright, I know Christmas is over but you can make pennant banners for all sorts of occasions! Birthdays, Valentine’s Day, bedroom decorations, anniversaries, you get the idea! In fact, I came up with the idea of making one by using a couple of different sources, neither of which was Christmas themed. I first saw the idea on Hang To Dry . They create and sell really beautiful applique designs. They also have several super cute applique pennant designs available. I have bought several of their designs since so you will probably see their stuff come up again. However, I did not buy one this time around. I was afraid to spend the money not knowing if I could really do this. Luckily I had a plan. I needed another free online tutorial! After a little searching, I found this tutorial at Sew In Harmony. The embroidery aspect of the banner was not covered in the instructions so I decided to just go for it.
 My applique savvy cousin had kindly informed me that I needed to buy stabilizer (yep, I am that much of a newbie) and although I couldn’t find the exact type she suggested, I bought a roll of tear-away and just followed the directions on the package (I am not going to go into detail here either but I plan on doing some embroidery/applique tutorials in the future for those who would like a little more info.)
I then went out and picked up some Christmas fabrics and red and green embroidery thread from Hobby Lobby and sat down and started playing with my machine.
For the applique…

I ended up using this preset circular frame

and this font already included with my machine.
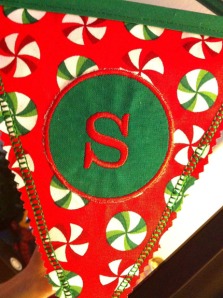
I put them together and ended up with this!
After I finished embroidering all my frames and letters, I followed the tutorial and was pretty pleased with the way it turned out.

Creating the Rosettes :
 Once I looped the bias tape around the corners of my mirror I thought it looked a little unfinished so I came up with these rosettes using scraps. Originally I tried using the preset frames on my machine to attach them together and create the flower’s center. Once I decided to use the buttons for centers instead, I realized they could just as easily have been sewn together by hand. If you want to make some of your own its really simple.
-First cut your leftover fabrics into varying size circles.
-Find a coordinating button.
-Stack your circles largest on bottom to smallest on top.
-Sew the button on through all the layers (a thimble helps).
-To get the frayed ends, wet the edges of the fabric and run your fingernail along them.
You’re done. Now wasn’t that super easy!
I am still pretty proud of my first embroidery attempt. It went much smoother than anticipated. In fact, I only messed up a letter once! The fabric moved inside the frame somehow and the stitching was off. It did not go to waste. There is an “M” pennant floating around the house somewhere because my 3 year old daughter Maya recognized it as the first letter of her name and claimed it as her own!
I am so amazed how much awesome sewing information is out there for newbies like me. I finished this project feeling like I could accomplish anything armed with my machine! Now I only have to decide which project to do next? Hmmmmm…
