
 There are a lot of great shirring tutorials out there but I had a lot of issues getting my Brother LB-6800 to shirr. I pieced together a few tutorials I found online and came up with this. It works well for my machine. I do not have experience shirring on any other machines but hopefully this information will be of use to others who own a LB-6800 or a similar Brother.
First, I prepped my fabric. I used this tutorial incorporating CKC’s Faith pattern. That is the same pattern I used in the recent sew-along.
 Then, I removed the flat bed attachment and the needle plate cover.
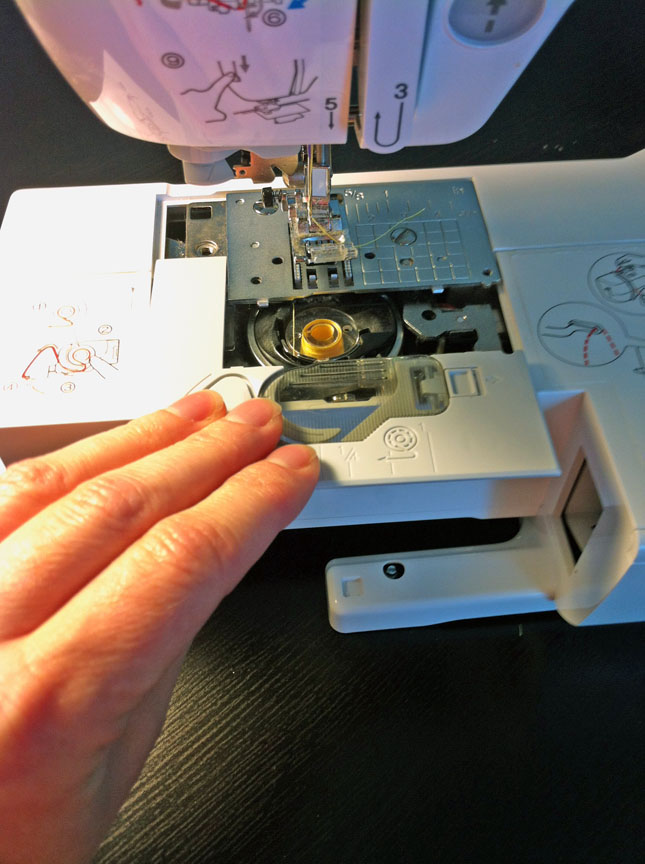
And pulled out the bobbin case. Please ignore my dirty machine!

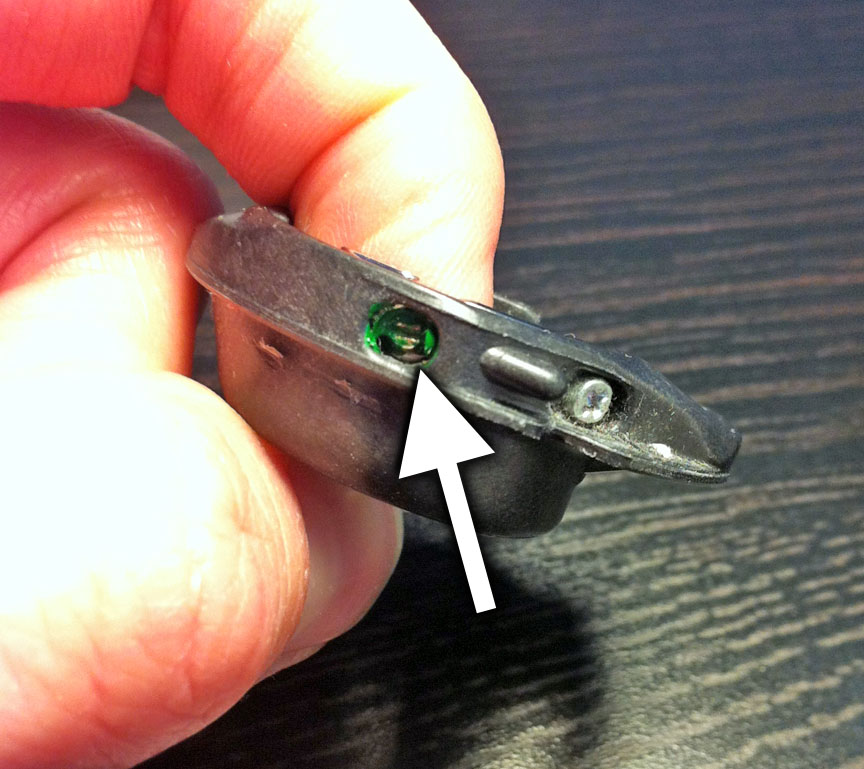
Next, you need to tighten the green flat head screw (not the Phillips head screw). You will need an eyeglass kit sized screwdriver.
The elastic thread goes in the bobbin and normal thread goes on top. Machine wind the bobbin with the elastic thread. I used Sewology’s elastic thread from Hobby Lobby. Most shirring tutorials call for hand winding the bobbin but that is not necessary with this machine.

Hand thread the bobbin through the tension adjustment spring by slipping the bobbin thread through the notch while the bobbin case is removed from the machine. The arrow below indicates the correct notch.

Pull elastic thread to the left in the direction indicated by the arrow. The thread should look like this below.

Don’t worry about the tension of the thread wound on the bobbin. If the elastic thread was wound too tightly around the bobbin, it may cause the bobbin case to spin. If it spins, don’t worry, just make sure the elastic thread is still correctly wound around the bobbin. The tension is created when it is threaded properly through the tension adjustment spring in the bobbin case and the screw is adequately tightened.
Replace the bobbin case. To finalize prepping the machine for shirring, follow these steps:
1. Make sure you have a long tail on the bobbin thread and turn the wheel while holding the upper thread.
2. The upper thread will then catch the lower elastic thread.
3. Pull the elastic thread up through the machine.
4. Both the upper and lower threads should be visible on top of the plate.

Replace your needle plate cover.
I suggest you test a few lines of shirring on a piece of scrap fabric first to check if the bobbin case tension is set correctly. Here is my test strip. Looks good to me!

A few important things to know when shirring:
Remember to back stitch at the beginning and end of each section.
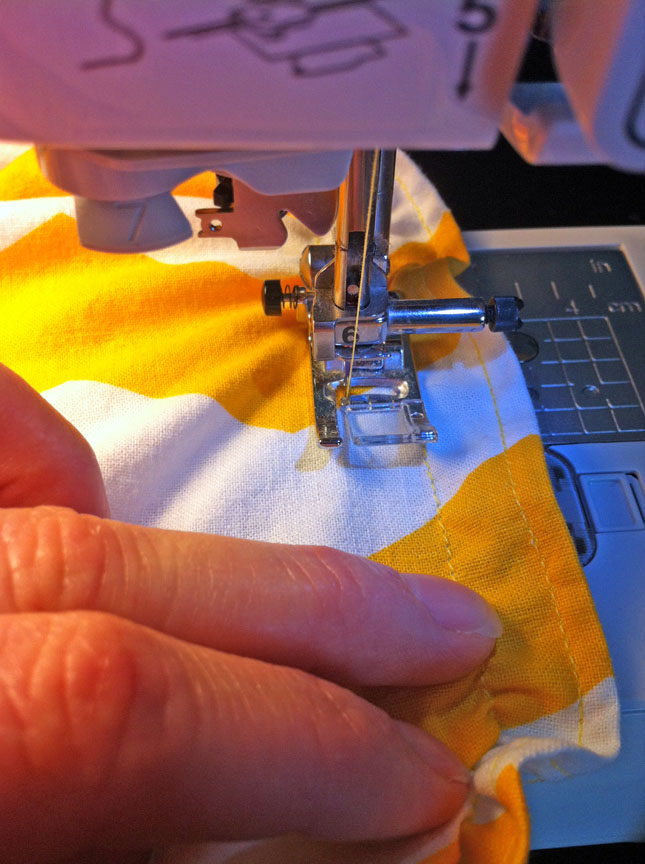
Use a regular straight stitch (I used a stitch length of 2.5 and my tension was at 3.)
Sew with fabric right side up so the elastic thread is on the inside of the garment.
Don’t use the thread cutter on the machine if you have one. Pull the thread away from the machine and cut it manually. Otherwise, you will have to re-catch the bobbin thread at the beginning of each new row.

Make sure you flatten out the fabric as you sew.
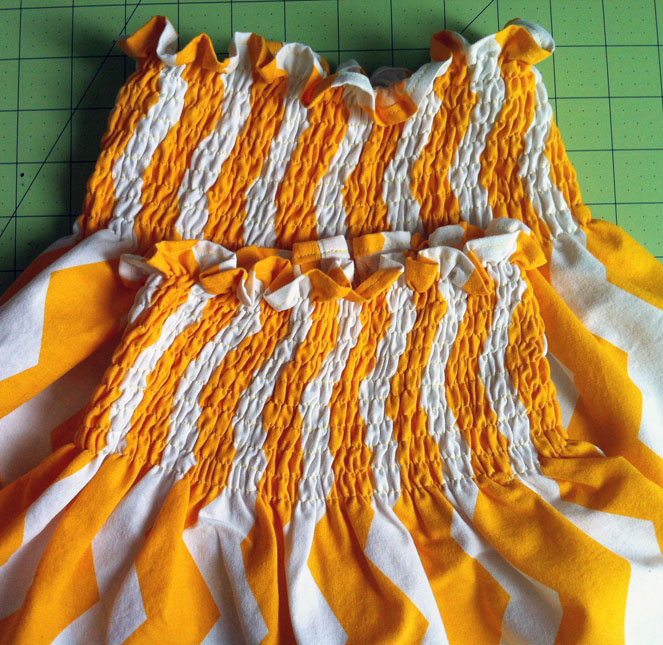
Hit it with steam when you are done! This is one of my favorite things about shirring. When you steam it, it shrinks right before your eyes!
I steamed the bottom one only for comparison.
I found my elastic thread wasn’t holding occasionally with back stitching. To fix it, I pulled a few stitches out in order to have a tie-able length of elastic thread and re-stitched it in the spot where it came loose. I then tied the elastic thread ends together – also a great solution when you run out of bobbin thread mid-line!
I finally decided to knot the ends of the elastic thread at the end of each line to prevent problems with the backstitch not holding.

Don’t forget to readjust you tension on the bobbin case when you are done!
Here are a few images of my girls wearing the finished tops.

 The shorts they are wearing (and matching up chevrons at the seams) will be discussed in a post coming soon!
